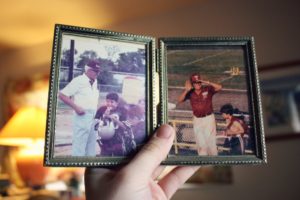
 If you suffer a flood, Project X Restoration can help restore your home and life. Today, we present Water Damage Restoration Part 1: Salvaging Photos. Sure, water damage can ruin expensive items like televisions and furniture, but our clients often focus their energy on saving sentimental possessions such as photos. While “things” can be purchased again, we know that it may be impossible to replace these precious mementos. Today, we offer some suggestions on how to save your photos from water damage.
Remove Photos
After you’ve located the water damaged photos, very carefully remove the photos from water. If they are in albums or stacked on top of each other, separate them. Do your best to not rub them or touch the wet surface of the photo.
Try to take out any photos that are in frames when they are still wet. If you don’t, the picture can stick to the glass when it dries. If that happens the photo will most likely be damaged. Keep the glass and photo together as you rinse them with flowing water. The water will usually separate the photo from the glass.
It’s best to begin saving the pictures within two days of the water damage or they can start to mold or stick together. After that happens, saving them becomes more difficult.
You can prioritize which photos to do first. You might want to start with the ones that have no negatives since they will be harder to replace or the ones that mean the most to you.
Rinse with Water
Usually, the photos have been submerged in dirty, muddy or contaminated water. You will want to gently rinse both sides of the pictures with cold, clean water from a bucket or a sink. Change the water often to make sure it is always clean. Again, try not to rub the photos.
Lay Flat
It’s best to gently lay the wet photos with the picture side up on a clean piece of blotting paper, like a paper towel, as soon as you can. If you use newspapers or paper towels with prints the ink may come off on your photos. It’s best to do this indoors to avoid the sun and the wind which can damage and curl the photos. Don’t forget to change the blotting paper. Your goal is to dry the photos.
Delayed Drying
Sometimes you just don’t have time to dry your water-damaged photos right away. If that’s the case, rinse them and stack the wet pictures between wax paper sheets and seal them in a Ziploc plastic bag.
One trick is to freeze the photos in the bag to stop the damage. If you do this the right way, your photos can be defrosted, separated and air-dried at a later time.
If you experience water damage, contact the restoration specialists at Project X in Denver. We’ll take care of the heavy lifting while you focus on what’s most important to you. Though it would be far better if you never need it, we hope this quick guide, Water Damage Restoration Part 1: Salvaging Photos, helps you save some of your most important and irreplaceable memories.